Hey everyone! After my post on Google Classroom a couple of weeks ago, I’ve had some questions about using Google resources in Schoology. It’s pretty easy once you get the hang of it! In order to assign Google resources through Schoology, you will need a Schoology account, a Google Drive account, and a resource saved in your Google Drive. The resource used in this example is my Imperfect Tense Dibujos Misteriosos, which you can find here.
Are you in a Microsoft district? Check out my post here with instructions on assigning from OneDrive.
Step One: Install Google Drive Assignments in Schoology


To get started, open up Schoology and sign in. You will need to navigate to the Schoology App Center, which is located in the top bar and looks like four squares.

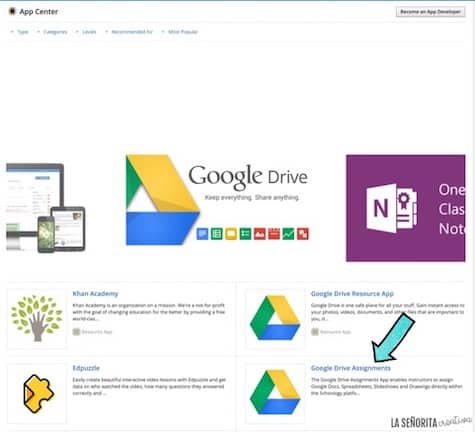
When you open the App Center, find and click on the “Google Drive Assignments” app. There is also a “Google Drive Resource app”, but that’s not the one you want.

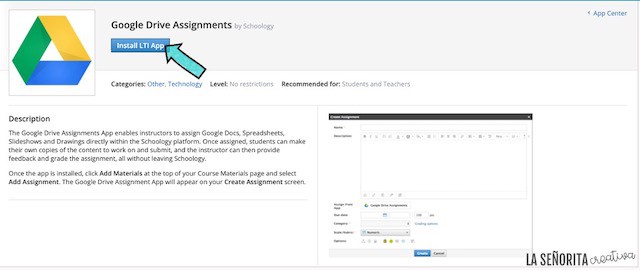
That will open up the app information. Click on “Install LTI App”. If you are using a district-provided Schoology account, make sure you are allowed to add third-party apps to your account, as some districts do not allow this.

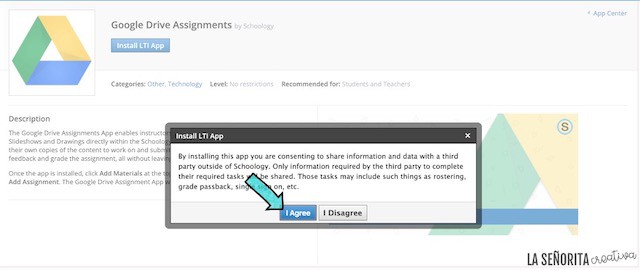
Read the information about installing the app and click “I Agree” if you want to install the app.

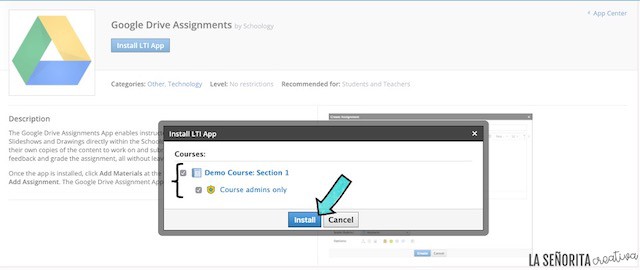
It will make you select the courses you want to use the app in. I always select all of my courses, and then “Course admins only” as seen in the image above.

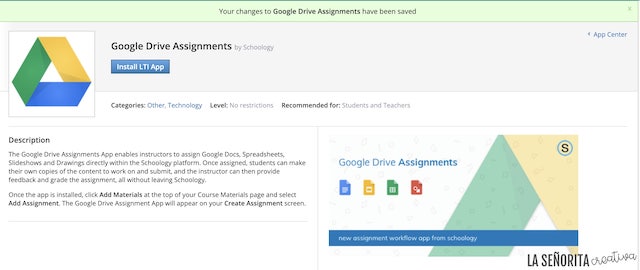
Once it’s been installed, you should see a green bar pop up at the top of the screen letting you know your changes have been saved.
Step Two: Assign a Google Drive Resource

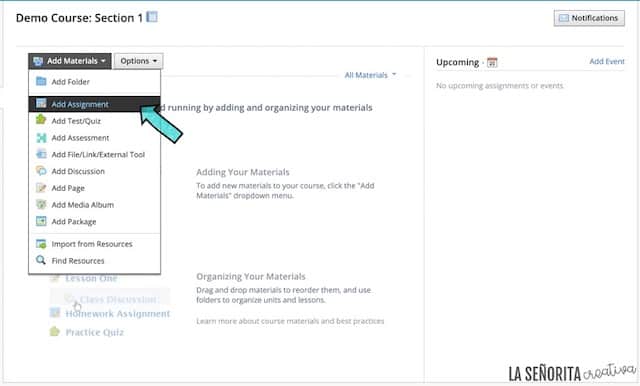
Now that you have installed the Google Drive Assignments app, navigate to the course where you wish to assign something. Click “Add Materials” and then “Add Assignment”.

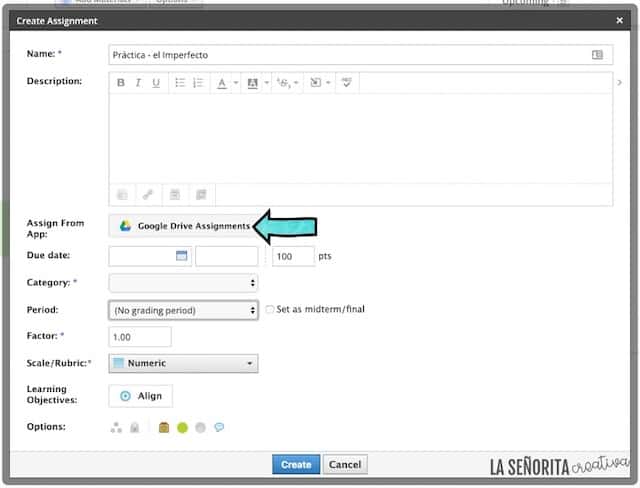
In the “Create Assignment” window, add the name of the assignment, a description (I usually put my directions here), due date, and so on. Once you have all the assignment settings the way you want, click “Google Drive Assignments” next to “Assign from App”.

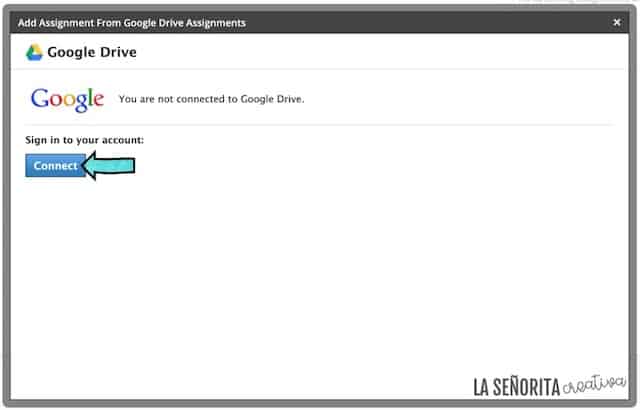
If this is your first time using the Google Drive app within Schoology, it will ask you to sign in to your Google account.

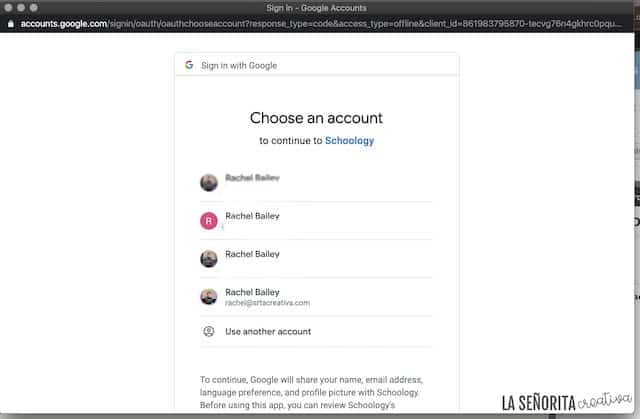
If you have more than one Google account, make sure you sign in to the one where the resource is located.

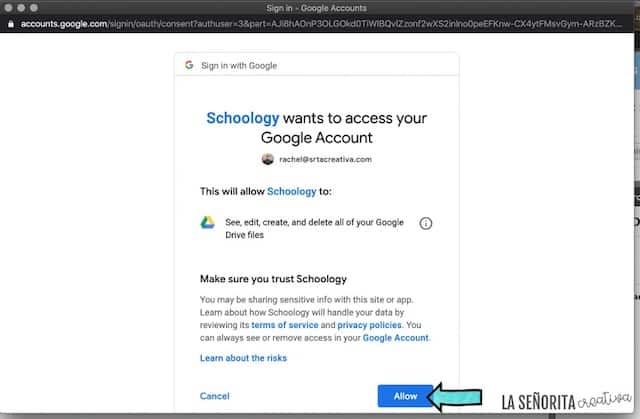
Next, it will ask you to allow Schoology access to your Google Drive account. Click “Allow”.

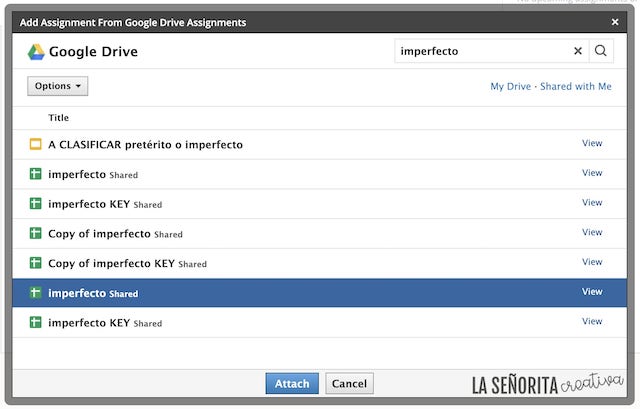
Once you have connected your Google account, it will open up a navigation window with all of the files housed in your account. Navigate to the resource you wish to assign. If you have a lot of files in your Google account like me, it’s always quicker for me to use the search bar instead of scrolling through everything.


Schoology makes it really easy to make sure you have the correct file. Just click “view” next to the file and it will open the file in a pop-up window. This is especially helpful if you have files with similar names.


You’re almost done! You will notice that now it shows the Google file I’m assigning and it lets me know that it will create a copy for each student. Make sure all of the assignment settings are correct, and hit “Create”.

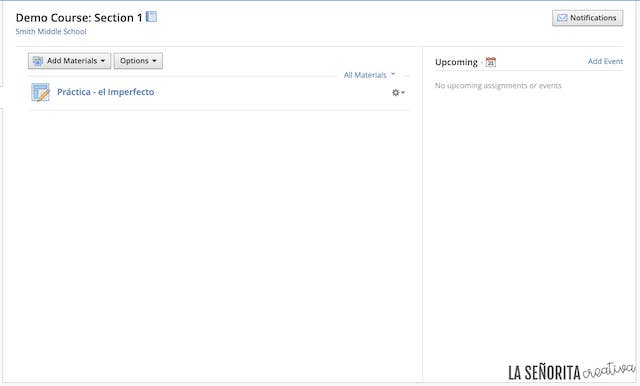
Now your assignment will show up on your course page. Assignments from Google Drive look different from other assignments. Click on the assignment to see what I’m talking about.

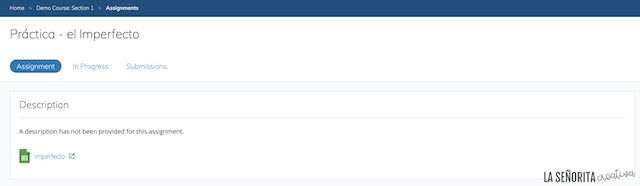
When you open the assignment, you will have three tabs: Assignment, In Progress, and Submissions. The assignment tab houses the assignment information and Google Drive file.
The next tab is one of my favorites. Many times, I would have students “forget” to submit an assignment, but swear that they finished it. This tab allows you to check up on that. You can see exactly how much they have accomplished, all without leaving Schoology. This also allows you to monitor student progress during the assignment.
The last tab, Submissions, is where you will be able to see the assignments that have been turned in and grade those assignments.
I hope this tutorial was helpful! Leave me a comment below if there’s anything else you would like a tutorial on!